Best Pickles Ever.
July 6, 2010
I am officially kicking off the summer pickling season today. Making “kid pickles”. My kids have dubbed them as such because they want to eat the whole jar and not let any grownups have any. Good luck with that, kids.
The following is from Gogol Gastronomy:
What you will need: organic cherry tomatoes or gherkins. No, supermarket oversized cucumbers just wouldn’t do..even if you cut them up. Try getting gherkins at a farmers market when they are in season. Another thing you will need is a big glass preserving jar (make sure the glass is thick) and a large pot. And of course put any spices you like. Cardamom gives it an extra kick.
Ingredients:
- Water – 1 litre

- Coarse sea salt – 4 full tbs
- Sugar – 2 full tbs
- White vinegar(6%) – 2 tbs
- Garlic cloves (peeled,whole) – 4
- Bay leaves – 2
- Black pepper corns – 4
- Corriander seeds – 2tsp
- Dried dill – a bunch
- Celery leaves – a few
- Wash your gherkins or cherry tomatoes (choose how many you want to pickle yourself).
- Put cold water, salt, sugar and vinegar into a large pot and bring to a boil.
- Put the gherkins (or tomatoes) into the jar together with the herbs and pepper; pour the hot brine over them and close the jar (not too tightly).
- Put the jar in a warm place for 3/4 days (the longer you leave them out, the stronger they will taste), transfer it into your fridge after that.
They are ready! Enjoy them after taking a shot of the best quality vodka (preferably out of a slender crystal liqueur glass, with some salmon and rye bread on the table, so you look and feel like a decadent intellectual from the 1920s, not an alky)
knitting for kids
January 31, 2010
The thing about knitting for kids is, I always hesitate because I know they will grow out of the thing in a couple of years. As much as my daughter really does appreciate the things I make her, and she even has a little sister to carrythe torch, it still smarts to put all that into something that will be too small in the near future.
So I was very happy with these little wrist warmers I came up with.
The 5 year old wanted me to knit her a pair of mittens, since the ones I made for her 2 years ago are now too small. I thought it would be a good idea to try a pair of ribbed wrist warmers. I knit them just a tad too big for her but the ribbing makes them fit perfectly. And now she can wear them for years before she grows out of them.  WIN, WIN.
The importance of pre-washing. (And how to make a cute nap blanket)
January 22, 2010
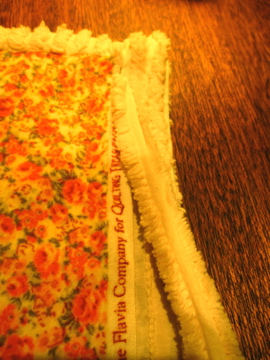
I made a little nap blanket for the 5-year old to bring to preschool with her. I found some great lavender chenille that I planned to back with a printed flannel.
When I started sewing I always used to skip pre-washing. I didn’t really think it made that much of a difference. But it really does. Especially when you are working with 2 fabrics that behave very differently. I had the fabric store cut both of these fabrics to be the same size. I washed and dried them before stitching them together because I knew that one would shrink more than the other. I really didn’t realize how much more, but take a look for yourself. (Sorry for the terrible photography. My camera doesn’t like night time)
The picture above is the crazy amount of lint that the piece of chenille released in the dryer. It was rather beastly.
So after all that, it was quite easy to stitch the 2 pieces together to make a very nice, cozy nap blanket for school. Check it out…
Rainbow cake
January 16, 2010
The older daughter had her birthday this month, she turned 5! She had been telling me for MONTHS that she wanted a cake with roses made of frosting. So I had been watching the youtube cake ladies show me how to make roses, and getting up my courage to attempt one myself, when I was SAVED at the last minute! I started showing her cakes on the internet, to get her reaction, and she saw some cakes with rainbows on them that really got her excited. So we looked at more cakes and she decided she wanted hers to look like this one over at the Spicy Skillet. Looked do-able! And the little flowers would serve as a reasonable substitute for roses! Hooray!
On our journey through the land of rainbow cakes we also spotted this one at Whatever. Looked very good! Kind of intimidating…. all that baking, all those bowls…. all the food coloring. Oy. Looked very fun but I was concerned about handing a 5 year old a slice of cake 7 inches tall.
THEN… My husband told me about this video from the New York Times. A very inspiring glimpse into some old school baking. These ladies and their pancake-thin layers of cake just about blew my mind.
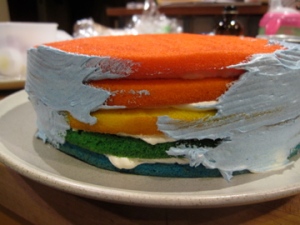
So. Here is the cake I came up with. Overall, it was a big hit. She told me “mommy, I want you to make me the exact same cake next year!” So I guess she liked it!
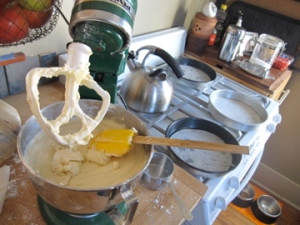
I started out by just making a regular cake batter. I used the white cake recipe I found on epicurious.
Then separate the batter into 5 bowls.
Add food coloring. I used gel food coloring from Wilton to get really vibrant color.
Spread the cake batter really thin, about the thickness of a pancake. I sprayed the pans with non-stick spray and lined them with parchment, and then sprayed that too. This is critical to making such thin layers that will release from the pan without tearing.
Each layer only needs to bake about 10 minutes. I only had 3 pans so I had to bake them in 2 batches.
Apply a crumb coat, let it cool, then go back in with more icing. I used a buttercream.
I used the leftover batter to make a batch of cupcakes for school. I used one spoonful of each color batter per cup. It made a nice layered effect, too.
Putting up pickles.
August 25, 2009
It’s the height of summer! My garden is producing cucumbers and tomatoes like wildfire. I love taking some time out to preserve the bounty of summer. Cucumbers are my favorite thing to preserve, but I also can pears from our pear tree, and make Quince jam from the Quince bushes that were here when I bought the house 10 years ago.
My husband and I have been pickling for a few years now, and are still getting the hang of it. There certainly is a learning curve to produce pickles that are not soft and will keep a few months. Our favorite book on the subject is The Joy of Pickling by Linda Zeidrich. This year I am taking to heart her admonition that “Vinegar is not embalming fluid” and throwing out all the pickles from previous years. I don’t know why I let old jars of pickles stack up but I resolve not to do it anymore. I’m also resolved to get all our pickles consumed by us and our friends and neighbors by spring of next year. The point of canning is to prolong the harvest, and enjoy your garden veggies through the winter. When spring comes I will be ready to eat fresh again!
Here’s a pic of this year’s crop so far. I’ve made pickle relish, olive oil pickles, dill pickles, and some cornishons I am very excited to try in a couple weeks when they are fully pickled. I put up a batch of 14 pounds of fermented pickles in a crock and they all ended up in the compost. I just can’t get the hang of fermenting pickles. They always taste awful. I made the dutch lunch spears and LOVE them. I made a batch of four quarts, gave 2 away, and am almost through the last jar. I’ll probably make more next week. They are refrigerator pickles, ready in only a week and last a few months in the fridge. Also pictured are the quince jam and pickled pears from last year. The fruit seems to last longer but I promise to throw them out before I harvest this year’s pears and quince!
I am switching over from my ball jars to glass jars with rubber rings. I’m concerned because the dome lids on Kerr or Ball jars contain BPA, which releases nasty stuff into my home-grown produce when heated. I do still have an inventory of these jars, and use them when cold-packing pickles. Anything that calls for hot pack I will use my Weck jars. The only trouble I have with those is that the jars are so beautiful I am hesitant to give them away!
I have also been using some old style ball jars with rubber rings and glass tops. They seem to work fine but I am a little suspicious of the rubber rings, as they are made by the same company that makes the BPA dome lids.
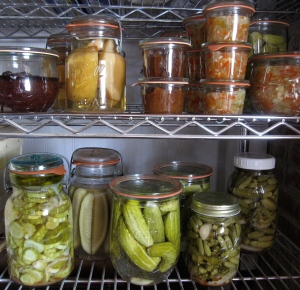
yum!
Wowls
July 19, 2009
Recently we paid a visit to the Maine Wildlife Park in Gray, Maine. The park is set up to permanently house animals that can not survive in the wild due to injury or human intervention of some sort or another. It’s a pretty interesting place. Not exactly a zoo, but close. It is greeat to see the wild animals that co-exist with us up there in the Maine woods when we are there for the summer.
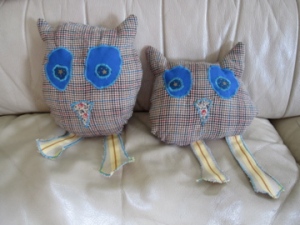
The girls both had a great time, but the main attraction for the 1 year old were the big birds. There were haws and eagles and owls, and she called them all “wowls”. I taught her the baby sign for owls which she enthusiastically showed back. And for the following week, she was constantly saying “wowl!” and putting her hands up next to her head in her version of the sign. We all just about died form the cuteness.
When we got home to RI I realized I didn’t have any owl toys. NOT ONE. I had a copy of owl babies, which frightens the 4 year old to this day. Which is probably why we have no other owls around. This situation had to be remedied quickly as the 1 year old was desperate to point at owls and tell me about them.
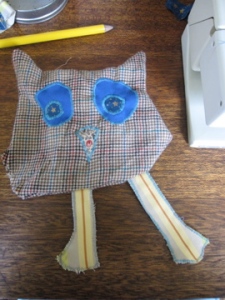
I recruited the 4 year old to make me a couple of drawings of owls. She did a great job, and I was able to make a sewing pattern from the drawing to create a pair of “sister wowls” in under an hour. Basically I just added an extra inch to the drawing that she made. (1″ for seam allowance, 1″ for depth) and cut approximations of the shapes she drew for the eyes and feet. For the main fabric I used an old wool shirt of my husbands that had been shrunk and felted from too many accidental trips through the washer. The four year old picked out the fabric for the eyes, beak, and legs. For the legs I used a double thickness of decorator canvas from my scrap box. The legs need a fabric with a bit of body. If I were to do it again I might use stitch witchery to attach the eyes to the body before top-stitching them down. But at the time I couldn’t be bothered to drive down the street to fetch it from my studio. So the eyes are a little wiggly. But the girls don’t care. The sister Wowls are very popular and seeing a 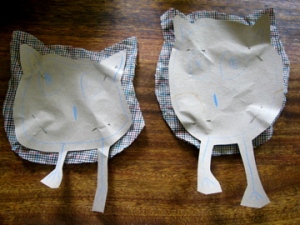
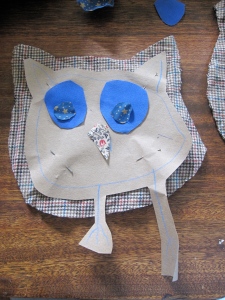
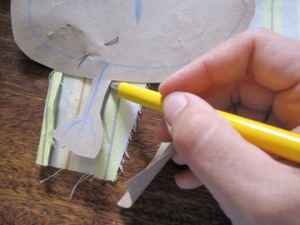
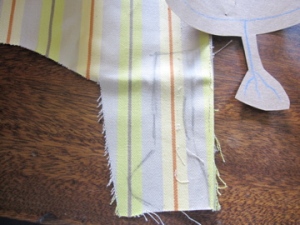
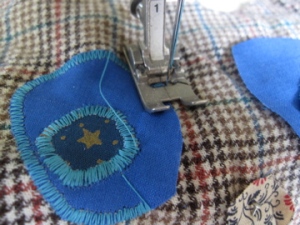
lot of play time.
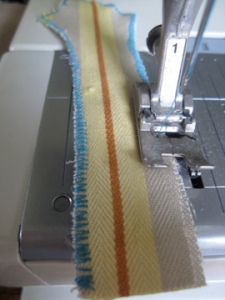
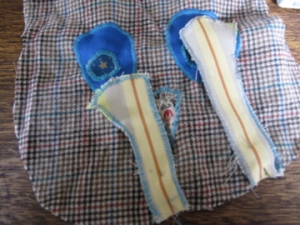
The dress-up drawer.
June 13, 2009
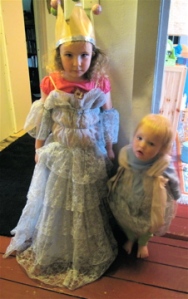 I have to say… I’m really not so into the princess thing. I chafe against all the commercial images of perfect little Disney princesses that are crammed into my daughter’s brain by the power of mass marketing. (We don’t even own a TV but it still gets through) However, I do remember how magical pretty froofy dresses were to me as a child.
Recently my older daughter has started showing interest in the pretty dress-up stuff that she has found at friends’ houses. So I decided she needed a dress-up drawer. We designated a drawer that had previously contained baby blankets and I set to work collecting froofy things. We went to our local Savers and stocked up on stuff, but I was surprised at how expensive things were, even second hand. A bridal veil for $15 seems a little too much to pay for a plaything.
Then I remembered that I still owned my old prom dress. I bought it at a vintage shop in Boston and wore it to the 1986 prom. It was still hanging in a closet at my mother’s house. It was strapless, so I removed all the vertical boning from the bodice and stitched in 3 bands of elastic around it horizontally. I re-purposed the hanging straps (intended to hang the dress on a hanger) as spaghetti straps and cut about 12 inches off the bottom. I used the excess to make “arm puffs” to go with the dress, plus a smaller little shift dress for the baby sister.
It has been a huuuuuge success. They want to wear them every day. What fun. I’m on the lookout for more stuff hanging in my mother’s closets to add to the dress-up drawer. All those bridesmaid dresses will finally get worn a second time!
Find your Tools!
May 29, 2009
Garden tools are so easily camouflaged in the garden. You put them down and they disappear. I paint the end of my tool handles bright red, and I never have trouble finding them. This picture shows a Japanese tool called a hori-hori. If you don’t have one, you should really consider adding it to your tool box. It is my most used tool in the garden.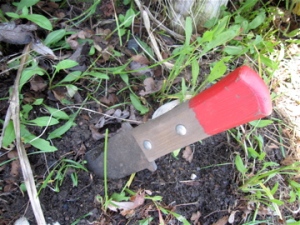
I learned this simple trick from my Dad, who learned it from his Dad.
The fastest DIY finger puppets ever.
May 21, 2009
Got an empty box of cereal? Or pasta? Or crackers? Or butter? Or mac and cheese? Sure you do. Got some scissors? 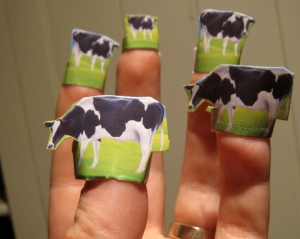
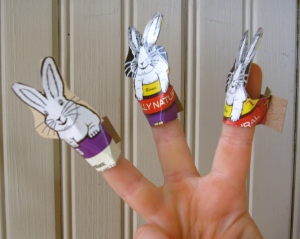
Well then, you and your kids can have a grand old time on a rainy day making finger puppets out of the boxes. Most of these boxes have some little animal or person printed on them. All you need to do is cut out the figure, adding a little bit of extra material at the bottom for a strap to go around the finger (as shown). Cut a tab on either side and connect.
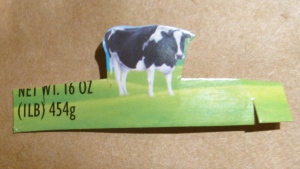
It’s kind of surprising how much fun this is for kids. At least for my kids. Your results may vary.
A bamboo irrigator for a strawberry pot
May 20, 2009
I found some strawberry planters at the job lot the other day. And it has been time to relocate the strawberries that have been living in our raised bed garden for a long time. They are getting crowded in there and they are taking up valuable real estate we could be using to grow other things. Like cucumbers, or kohlrabi, or tomatillos, or melons. mmmmm….
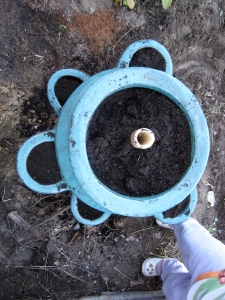
Anyway…. those planters are great but it can be tricky to keep the bottom sections watered. They have a tendency to dry out and then it is very difficult to get the soil moistened again. To solve this problem I cut a bamboo stick to length, just a couple of inches taller than the pot. And drilled out the membrane between sections (actually I asked my husband to do it, because I was holding the baby and the camera). Then drilled little holes all over the piece of bamboo.
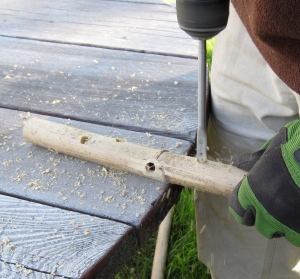
I inserted this in the center of the pot and the husband filled the pot with an organic potting soil.
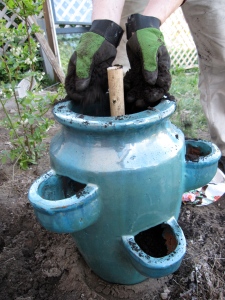
Now the pot is ready for the strawberries!
